"Magic Roller Coaster Ride"


So I did this thing.
For my 2D animation class.
Watch fullscreen to see the details better.
Haha- have a look see:

http://www.youtube.com/watch?v=JeuYLEuCip0&feature=youtu.be

It's around 300 frames, and I think total hours into it was about 3 hours or so.
My teacher liked it, and said I "leveled up" from last time.


[Late]Finished Lamp

I seem to have forgotten to post my finished lamp a long time ago..
The lamp is textured, and there is a point light that I applied to see more of its geometry.
Here are a few renders.


Ultimately, I did not like the end result~
The only part I really liked was the metallic part, but I didn't get the effect that I wanted on the paper part.


Low-Poly/High-Poly Panelization

Well, these are pretty basic walls.
These are rather low poly, and they're real basic.
I didn't include a floor or ceiling, because it would most likely just be a floor with basic wood paneling texture on it. And the ceiling would be your average white ceiling. These are based off a stage in the game I had chosen.

========================================================================

The next ones are more interesting, as they're high poly, and more of what I had in mind for what I'd want in a game where these would be used.
Up following are my high poly walls, and also a series of renders that I did of a small room I created using the high poly models of these walls.
The models would probably look better with textures on them.
Essentially, the extrusions from the wall are supposed to be some sort of wood paneling.
=================================================================
And here is the small room.

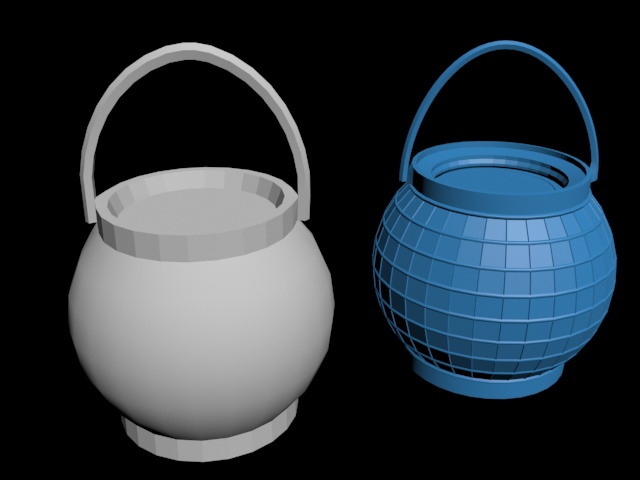
Hey look! It's that one lamp that one cool guy did!
Gosh, look at that lamp.
It's so glorious.
The person that made that lamp must be proud.


Panelization References

The game that I chose was Naruto Ultimate Ninja Storm 3
I like how all the models are rendered in the game, and I just
like the art style of it in general. 


Unfortunately for me, there aren't many areas that are closed enough to make any kind of walls. But I know for a fact that there's a stage in the game where you are inside a Japanese Inn. So I'll try to emulate that as much as I can with the following post, when I will have my low poly Panelization.
 

Final Renders of my Catbug

Unfortunately I did not finish the animations for my model-
These are just the final renders with a few touch-ups I did on the model I had
previously posted.
(I had trouble moving bones when doing animations (I probably should have asked for help on the animations (stubborn me) but I didn't) so I ended up doing none)


Creature - Sketches(!) and References (+ Up8)

References

Our current assignment is to work on a creature of some sort, and I've decided on working on a spider/cat hybrid, inspired by 3 different creatures. 
At first I was going to make it more cat-like, but I liked
my simple design after shortly starting modeling it.

Cat-face bug. Known for having a cat face on it's hind.
I took the cat part of this spider, and made it
into my creature's head.
This is a World of Warcraft spider.
The thing I drew from this was the spikes going
down his back.
This is a Pokemon known as Galvantula.
I took the element that it only has 4 legs
rather than the normal 8 on a spider.
==============================================
Renders

 This is my low poly version of my Spider-Cat Hybrid.


Lamp Progress


This is the final product after modeling both high-poly and low-poly versions of my lamp.
The high-poly model was done first, then I made the replica in low-poly.
The only trouble was to add the metal piece, which is the thing that comes out on top to grab like a handle. 

These models were mostly done with bevel, but the metal piece was done with a spline that
was then converted into a polygon, and then attached by vertices onto the lid of the lamp.
I'm okay with the final result.

I wanted to add the paper decorations on the bottom of the lamp, but I can see the "paper" occupying a lot of polygons, so I just decided with the traditional.
If you look closely on the high-poly version of the lamp, I tried to simulate a lid on top that could potentially be opened and closed. I even added a little metal piece to keep it closed.


Lamp - Sketches And References

Main source of inspiration. Traditional Japanese paper lamp.

The lamp I chose to make was a Japanese-styled lamp, where the lamp itself is a sphere
and the source of light is a candle inside it. 
Normally the lamp will have a Japanese "kanji" written over it, and it also is accompanied by
dangling slices of paper which can also have writing, but may just serve as a simple 
decoration, as they can just be strips of colored paper.

Rough sketch and kanji I plan to use on the finished model


Helmet Progress 4/12

Here are some screenshots/renders of the modeled (high-poly) helmet
The general shape of the helmet was done with a sphere, that was then shelled to give it 
more thickness. The horns were done by extruding a vertice from one of the sides, and the goggles
were done with some torus primitives, which were then beveled, stretched, and bent to give it
the goggle shape. The shape on the "head-band" plate was done with a path, and having a cylinder with
a path deform modifier follow that path. 
To smooth some areas/corners/edges on the helmet, chamfer was used mostly,
and this was probably a mistake, since it then created all sorts of problems. Shelling the helmet 
wasn't a very great idea either.
The more you know.

Render 1

Render 2

Screenshot 1


Helmet Sketches And References 4/12


These are the first sketches, reworked over a dozen times. I couldn't decide what could go on the helmet itself, so I finally decided that it would be some type of horns, plus the symbol on the front. The 3D design was reworked in the final version, and this was because I couldn't find a way to make the shape at the base of the helm.


Japanese samurai Helmet with horns
My inspiration for this helm was mainly from a character in the Naruto anime series called Hanzo of the Salamander. Hanzo uses a full helm with the symbol representing the village he came from carved on a metal plate placed where the forehead is located. This was the main inspiration for the spiral indentation I planned the helm to have. My inspiration for the goggles came from steampunk culture, where the use of aviator goggles is quite common. The goggles would come attached to the helm, and the bridge, in my original concept, could be adjusted. The horns on my sketch are inspired from most Japanese samurai armor, which would normally have horns, or some kind of adornment on the top of the helm.

Hanzo of the Salamander