Helmet Progress 4/12

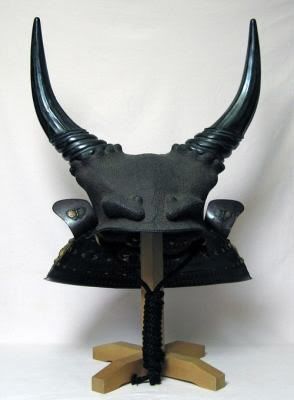
Here are some screenshots/renders of the modeled (high-poly) helmet
The general shape of the helmet was done with a sphere, that was then shelled to give it 
more thickness. The horns were done by extruding a vertice from one of the sides, and the goggles
were done with some torus primitives, which were then beveled, stretched, and bent to give it
the goggle shape. The shape on the "head-band" plate was done with a path, and having a cylinder with
a path deform modifier follow that path. 
To smooth some areas/corners/edges on the helmet, chamfer was used mostly,
and this was probably a mistake, since it then created all sorts of problems. Shelling the helmet 
wasn't a very great idea either.
The more you know.

Render 1

Render 2

Screenshot 1


Helmet Sketches And References 4/12


These are the first sketches, reworked over a dozen times. I couldn't decide what could go on the helmet itself, so I finally decided that it would be some type of horns, plus the symbol on the front. The 3D design was reworked in the final version, and this was because I couldn't find a way to make the shape at the base of the helm.


Japanese samurai Helmet with horns
My inspiration for this helm was mainly from a character in the Naruto anime series called Hanzo of the Salamander. Hanzo uses a full helm with the symbol representing the village he came from carved on a metal plate placed where the forehead is located. This was the main inspiration for the spiral indentation I planned the helm to have. My inspiration for the goggles came from steampunk culture, where the use of aviator goggles is quite common. The goggles would come attached to the helm, and the bridge, in my original concept, could be adjusted. The horns on my sketch are inspired from most Japanese samurai armor, which would normally have horns, or some kind of adornment on the top of the helm.

Hanzo of the Salamander